Tuesday, December 27, 2016

Dendritic and Beyond...

Anticipating a Dendritic Techniques group swap sometime in 2017, I used a glass mirror for a base and a rigid plastic box cover 
to "smoosh" the acrylic paint layer between them.  
I should make up a tutorial, 
although YouTube has several.

My brief process description:
Either drizzle over, or place drops 
of acrylic paint onto, a non-porous surface.
Cover with another non-porous surface.
Press firmly, even using your thumbs/fingers 
to spread the paint between the two layers.
While you peel the two layers carefully apart,
you will see the Dendritic pattern forming.
(It reminds me of coral branches.)
You can control, to a certain extent, 
which way the pattern spreads out.
As you separate the two layers, the paint 
is deciding which surface to cling to.  Smiles

Then you can pick-up the patterns by pressing and 
smoothing good-quality paper or card stock 
onto one or both painted surfaces.
You may repeat the process with
the same color paint or a different paint color
to make layers of pattern.
Add collage or other designs as you wish.

I picked up the following patterns 
with some card stock:


This is a purple envelope I over-printed 
with acrylic paint/dendritic patterns:


My detour:
Then I drizzled paint over the glass/base, used a rubber brayer to spread out the paint, and watched the paint begin to move since it didn't adhere to the glass like it would 
to a Gelli Plate Printer.  Again, you get the paint 
separations which make the patterns.
These designs (and a little collage) resulted:


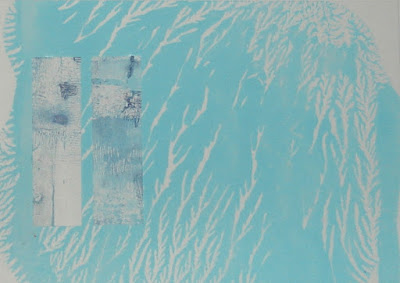
The pattern below suggested a pond reflection and trees so I drew in a shoreline, adding sky and water with watercolor pencils:

Saturday, December 24, 2016

My Greetings:

On this Christmas Eve, I just want to say how very thankful I am for the friendships we've forged 
through correspondence  
and the exchange of mail art.  I feel very blessed.
If I could, I'd give each one a hug.
Merry Christmas
Happy New Year


Thursday, December 22, 2016

One Good Rolodex Deserves Another?

I thought I would be able to abstain from altering 
Rolodex cards for a few days, at least... 
But I was wrong.


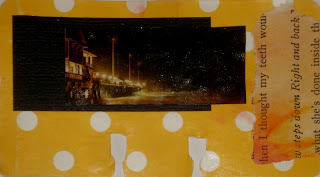
(Fronts and backs of six altered/collaged Rolodex cards)

Wednesday, December 21, 2016

Holiday Quilts I Have Made...


Please pardon this re-run of former quilts if you have followed my blog for a while.  I'm taking a very short break from paper arts and wanted to post something with a Christmas theme.  All good wishes to each one who has viewed my projects.  
May Peace, Joy and Love light your way, 
now and in the fast-approaching New Year.
Blessings and creativity always!

Friday, December 16, 2016

One More...


This will probably be my last altered Rolodex card until after the holidays.  Maybe...


Wednesday, December 14, 2016

Multiple Alteredia Rolodexia Cardia

Just barely approaching Latin; doesn't that make it sound more dignified?


Gelli Plate background, clear stickers

Decorative paper bag background, painted text strip,
scrap paper piece, sticker, shell motif cut out from
gift wrapping paper 

Scrap book paper background, two cut-outs, stamped saying


Decorative bag background, stickers


Decorative bag background, painted text strip,
3-D painted pieces (square and circle)


Tissue gift wrap background, starfish cut-out from
gift wrap


Gelli Plate printed background, stickers

Fronts and backs of nine cards.
Help, I'm Rolodex-ing and I can't stop!

How To Make A Zine - Part Two


This is a continuation of a tutorial on constructing Zines.

After you have folded your Zine the long-way and pinched the outer edges in to make a "barfle," you  begin folding the pages toward each other, pressing the creases with your hands to strengthen the folds.

Start decorating Page 2 and 3 


If you then opened up your little booklet, you would see that Pages 1, 2, 3 and 4 all face you, and Pages 5, 6, the back page, and the title page, appear to be upside down.


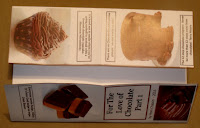
Here are two Chocolate-themed Zines I made a little while ago, shown here opened out.


First, fold the long ways, then open it out


Next, fold the short ways, then open it out


Third fold is one edge toward the center fold line, then open it out


Fourth fold: fold the other edge in toward the center fold line, then open out.


Remember to fold in half the short-way, (see How To Make A Zine Part One).  Cut along just part of the fold-line but not to the outer edges.  Then open out.

Fold in half the long-way, pinching both outer edges toward the center.  Begin strongly pressing the folds to smooth out the pages.  Make sure your TITLE PAGE is where it should be.

NOTE:  If the bottom corners of your TITLE PAGE and your PAGE ONE don't seem to line up nicely, a bit of double-stick tape between them helps to hold them smoothly flat.  If for some construction reason your pages are aligned differently, it's alright as long as your Title Page is the first page one views. 

Be sure to include your name and contact information, either on the back page or partly hidden on the inside/backs of the pages.

The front (title page)
of one of my Zines


The back page of both Zines


I THINK these are easier to make than to explain (or to study directions).  Good luck!